Portrait Lights
In this article I will discuss the basic lights that are used by portrait photographers and what effect their have on the photograph.
- Main Light
- Fill Light
- Hair Light
- Background Light
- Rim Light
- The placement of Lights
- Position of the Main Light
Overall Picture
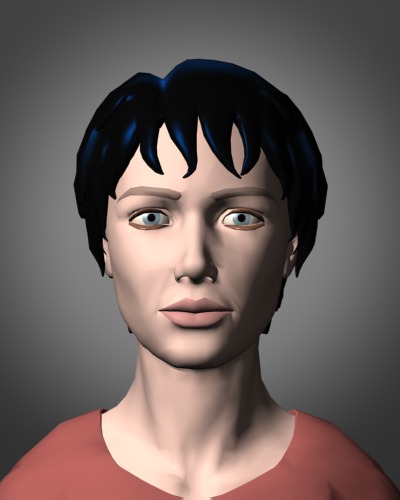
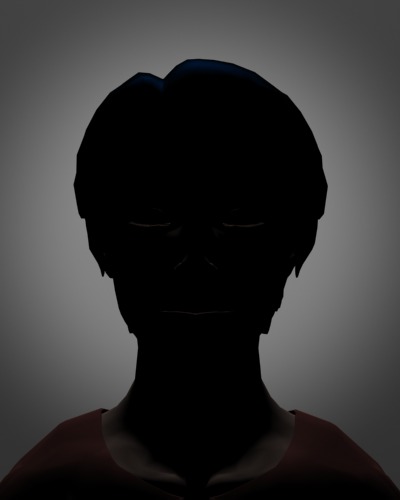
Please meet Jane, she is not real, but she generously agreed to be the model for my explanation of the studio lights. On the picture below you can see the final setup with four lights.
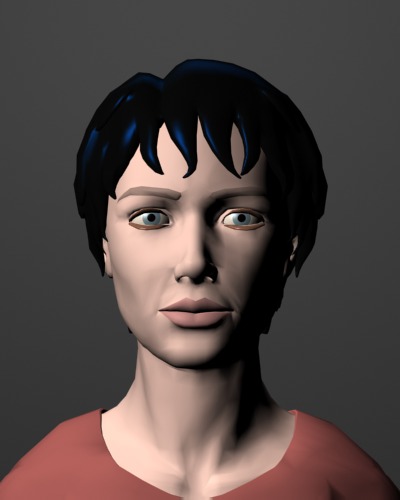
The Main Light
On the image below you can see only the main light. The main light is called in that way because it is the main source of light for the portrait. There are a few specifics about the light that you have to consider. First, usually, it is the most powerful light in the set. Second, the light defines the primary light pattern (such as Butterfly, Broad or Short Lighting, Rembrandt, Split Lighting and etc. - more on these patterns in the article "Basic Light Patterns"). Most of the times the main light should shine into both eyes of the subject and create definite catchlights, so the eyes would not look like two black holes. It is achieved by placing the light at 2 o'clock position (or 10 o'clock - depends on the side you want to cast the light on).
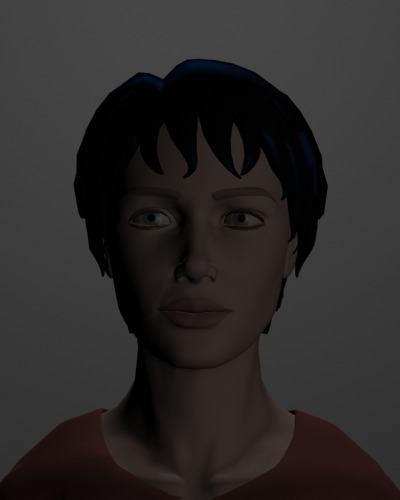
The Fill Light
The second most import light is the Fill Light. This light sometimes could be omitted (for dramatic look) or replaced by a reflector (i.e. on location), though the type of the source changes, but there is light anyway. The purpose of the light to soften the shadows that created by the main light source. Usually you would use the ratio 3:1 or 3:2 for portraits (where 3 is for the main light and 1 or 2 for the fill light). On the image below Jane is lit only by the fill light, which is placed a bit to the side and below of the camera. But you could use even the flash that is placed on the camera's hot shoe, in such cases it creates an additional catch light in the subject's eyes. I have to say that too many catchlights in the eyes could be unflattering. By the way, about catchlights, I know that some commercial photographers use a flash circle (somewhat bigger than the macro flash, when the flash is shaped as a circle around the lens), which creates unusual round catchlights.
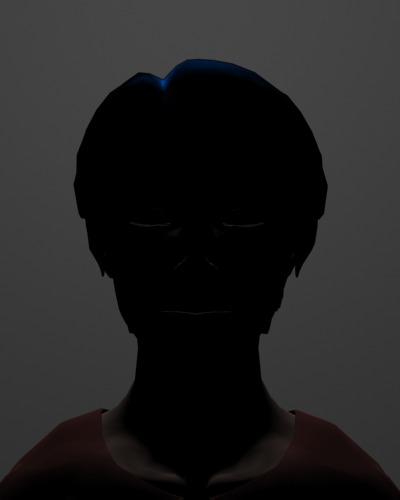
The Hair Light & Kicker
This light serves to accentuate the subject's hair and somewhat separate the subject from the background. It is especially crucial when the background is dark and the subject's head could blend in with the background. The hair light is placed high above the subject (could be slightly off to either side) and directed behind the subject on the floor or in front, but you should be very careful not to create flares by spilling some light into the lens. The beam of the light should be very narrow; photographers usually use grids, barn-doors or some other light modifiers to narrow the beam of light. Be careful not to spill some light on the forehead or shoulders. The power of the hair light could be equal the main light or be less - better to judge by the subject's look in the photograph.
There is another light, which is very similar to the hair light - the Kicker, which is placed above the subject to either side and placed in such a way to cast the light on the side of the head or/and shoulder. Kicker is useful for subjects's with long hair, so the hair get better light. Another application is to illuminate the veil of a bride.
You can see this very faint representation of the hair light in the image below, unfortunately, Jane has sticky hair.
The Background Light
The other way to separate the subject from the background is to cast some light on the background and create a hot spot directly behind the subject's head - as you can see on the image below. Because of this kind of application - lighting the background - the light is name the Background light. This light is placed behind the subject (somewhere at the waist level), so no appliance is visible to the camera and directed to the background. The power of the light depends primary on the color and tone of the background. You should be careful not to create a very hot spot on the background, which could distract the viewer from the face of the subject.
The Rim Light
If you turn the background light 180 degrees and direct it on the subject, the light starts illuminating the hair, and it will create a halo around the subject's head. It is another way to separate the subject from the background and add somewhat divine look. I have not created an image for this light, because Jane's hair is very sticky and the halo won't be visible, but you should try!
The Placement of The Lights
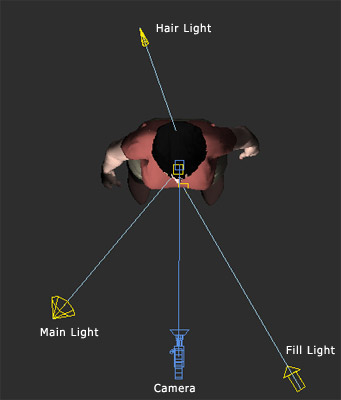
Now you are familiar with the lights and their characteristics and applications. So, let's review the overall position of lights. On the diagram below I show the view from above, so you can see the placement of the lights relatively to the camera (which is shown in blue color and placed at the bottom of the image). One remark, you can control the ratio of main and fill lights by their distance to the subject.
The diagram below shows all the lights from the photographer's left side, and you can see where the lights are directed and their vertical position.
~ Top ~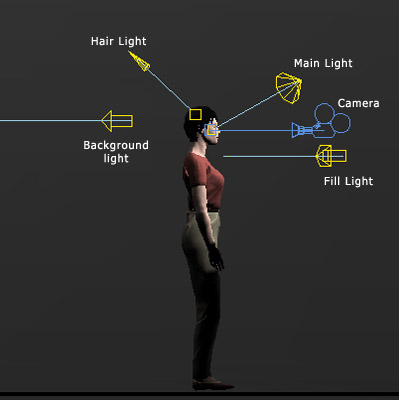
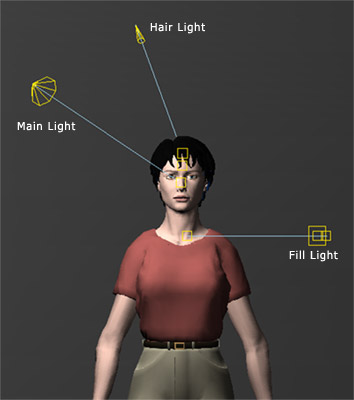
Once more we see Jane with three lights (without the background light).
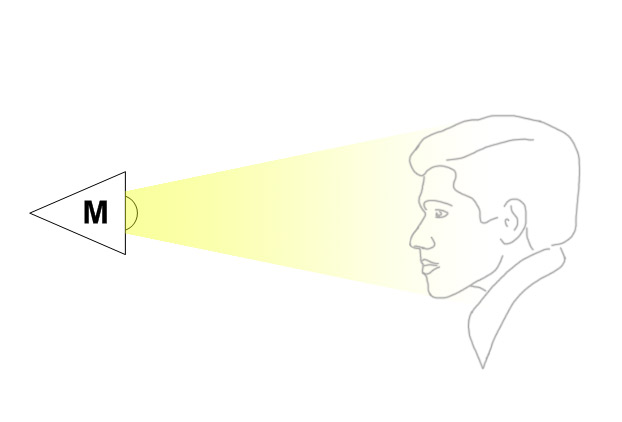
Position of the Main Light
A few more words on position of the main light. How do you avoid that flat look of the subject's face and still preserve the catchlights in his/her eyes? In the position as shown below the face is very well illuminated, but such position of the main light results in a flatly lit face. The light fails to create any appreciable dimension.
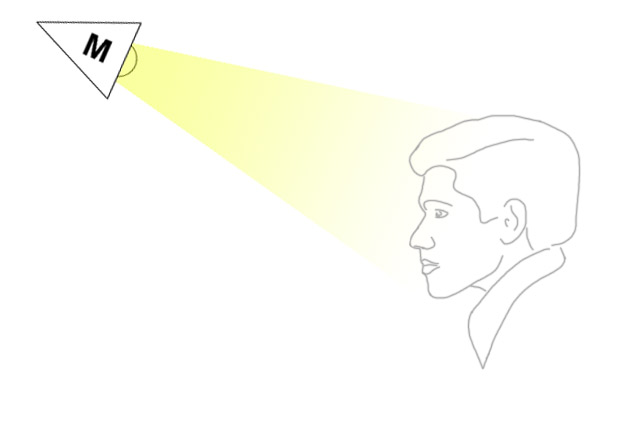
Let's move the light higher. With this position of the light the face has a good 3D look, however the eyes recede back into the sockets, the nose steps forward and the chin becomes more prominent (because of the cast shadows). But the shadows in the eye sockets completely hide the eye, there is no light and the effect is the lifeless and dull face.
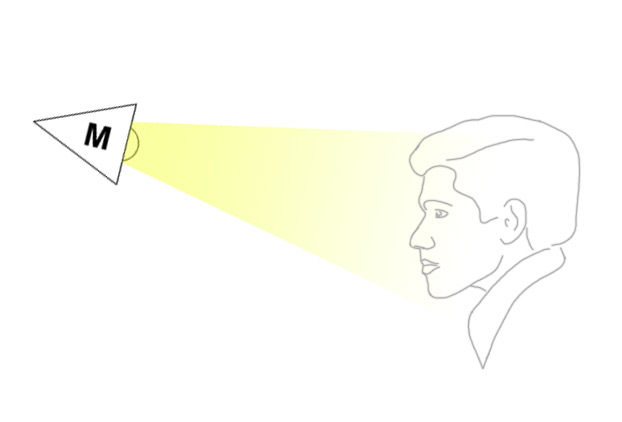
To get the catchlights in the eyes we have to lower the light a bit (10am or 2pm level/position) and let the light touch the eyes and create these marvelous reflections.


- Font size:


